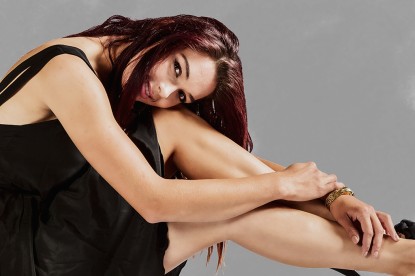
Portrait Night August 2013

August 22 at the Outlaws saw one of our studio nights with a couple of models.
There is always a degree of trepidation leading up to a model shoot at the Outlaws; can we get a model we can afford? Will that model turn up? Will the membership enjoy the evening and get something positive from it? We have in the past had glamour nights and portrait nights, the glamour nights have disappeared, but the portrait nights persist and the organisers always try to do their best to help make the evening as good as it possibly can be, and this time was no exception.
After seeking models for the evening and being let down by a couple of them, Danni kindly volunteered to come along for us, and much to our relief and appreciation Stella’s friend Yasmin also agreed to sit for us. Two models to keep the swelling membership busy, and a good job too, the turnout was extensive and we were allowed to use the larger room at the centre as well, so far so good.
Allowing for that many members and two models meant we really needed two lighting rigs and two backgrounds. As usual the club lights were wheeled out along with the cloth background and stands, this was set up with a broad lighting arrangement with a soft box and a brolly. Rick brought along his portable lighting kit, which consists of a number of speedlite strobes, a couple of soft boxes, lighting stands and a sunbounce reflector, this rig was set with a single overhead soft box and the reflector to bounce some light back upwards in a classic beauty lighting arrangement, optionally adding a second flash for hair light.
It wasn’t long before the membership got stuck in, the models were laughing, smiling, posing, flicking hair and there were smiling faces all round. After cracking off a few shots Rick and Ben circulated checking everyone was alright, questions then started to come in, and suggestions were given out, which is great because learning about different types of photography and bettering ourselves is pretty much the club ethos.
How do I keep my model well lit, but allow the background to go darker? This was a regularly asked question that evening, so tips were shared about using the shutter speed to control the ambient light and hence the background and the aperture to control how much light falls on the model, so if you want the background darker, the shutter speed needs to be increased. Watch out for that shutter sync failure though, Rick fell fowl of this once or twice whilst trying to push the speeds a bit, it turns out 1/200th is just that bit too fast, but 1/160th was about right for the wireless triggers.
As ever, the backgrounds were creased and annoyingly showing up in the photos, how do we get rid of that? Two options, well three if you include getting the iron out. The first option is to arrange the lighting so that the background is bleached out, this would mean having one light solely to light the background, and leaving only one light left for the model (more than enough one might say). The second option being the use of short depth of field (DoF) to allow the background to blur out, some people were having luck with this, others not so much, but it required long focal lengths, wide apertures and a good degree of separation between the model and the background. I suppose a fourth option would be to spend hours in photoshop afterwards, and if that’s what you enjoy, more power to you.
The time seemed to fly by, many ideas flowing and we are sure loads of great images were captured. Rick mentioned that he personally got a lot out of the evening even though he was hot and bothered by the end of it.
Many thanks to all that worked hard to make the evening a success, even the people that just helped to clear up. Biggest thanks go to both Danni and Yasmin who were great, up for a laugh and hoping for some great images. We hope all members who took images share them with both the models and the club members, let’s see those images folks.
Before the night started Ben set up his camera on a tripod, with the Sigma 10-20mm lens, this was linked to his laptop and using the Canon Utility software a time lapse was started with 1 image being taken once a minute for about 2 and a half hours, the resulting video is below or can be watched on his YouTube channel by clicking here.


